Monday, February 24, 2014

Wide Roman Shades: A Cautionary Tale

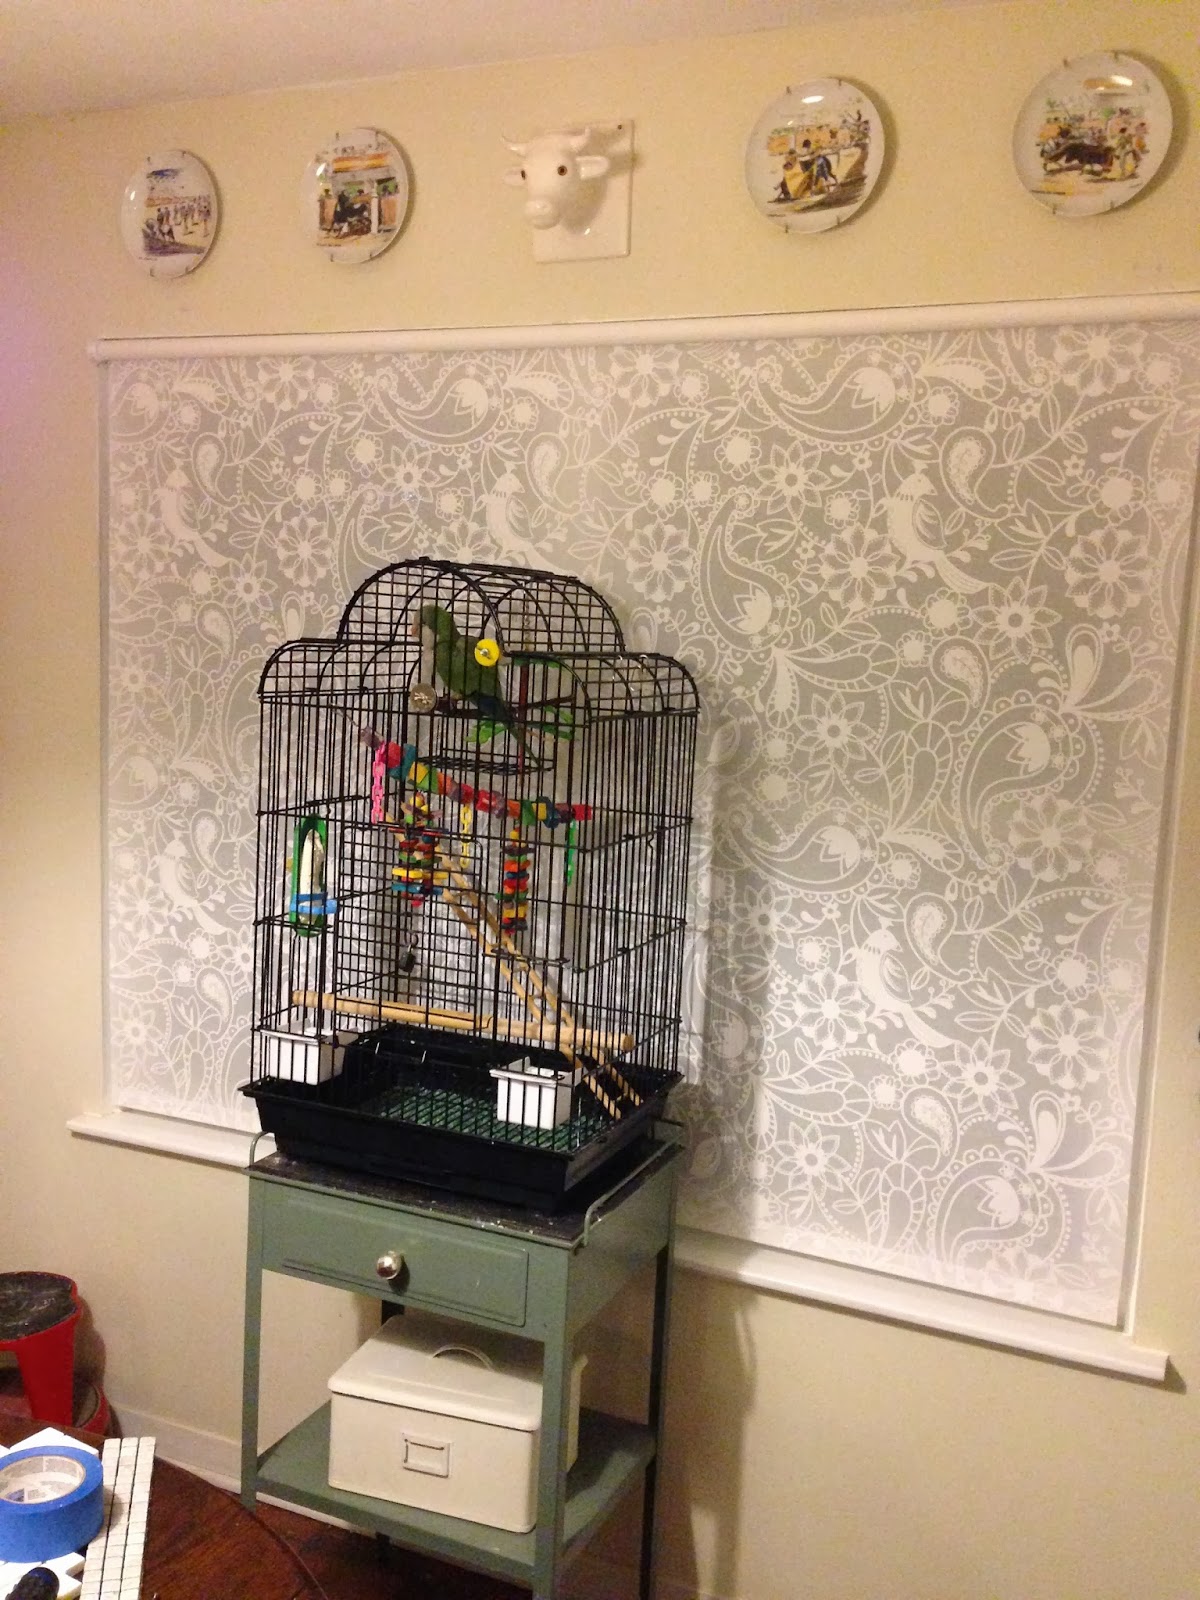
There is a reason, you don't see a lot of wide roman shades out there. They really just don't hold up to constant use. I suppose if you just wanted something decorative, it would be ok. But I made a double wide roman shade for our kitchen windows that was fully lined and pretty danged heavy. In the 3 years that we've been in the house, I've had to replace all the cords and it broke about every 3 months or so. The last straw came when a string broke and Mr. Pickles chewed a hole in it! Darn it Mr. Pickles!

Picking new fabric seemed like a herculean task, especially since it requires seaming to span the width of the two windows. I had already done the ENJE Ikea shade hack for the dining room windows. That turned out really well, so I decided to peruse the Ikea website to see what they had going on. Actually, in truth, I was looking at their blinds thinking I would mount two next to each other. And I saw this! I loved the fact that this print also had birds on it (so Mr. Pickles wouldn't be lonely) and it seemed a bit thicker than the Enje, so that it might stand on it's own.

Before:
After:


I might still make a valance to cover the very top, but I like how clean this blind looks!


Friday, February 21, 2014

Dining Room: Chandelier

When we moved in the dining room was hideous. One wall was painted a dark burgandy, it had 1970s track lighting, and the louvered doors. UGH.
Repainting was easy enough, ditto removing the doors, and there is still the hideous floor tile to be removed. But the lighting solution was a bit more involved. For one thing, the previous owners had decided to put an awful texture on the ceiling, but not popcorn, or something that could be "easily" scrapped off. We think they mixed drywall compound with gloss paint and applied it in a goopy fashion to create zillions of stalactites. Before we moved in, we had a new HVAC installed, which meant new vents in the ceiling and we removed the upper kitchen cabinets (which appear on the very left hand side of the photo above) to open the kitchen and dining room up to each other a bit more. So there was a lot of ceiling repair needed.

We went to Home Depot and rented a drywall sander that hooks up to your shop vac (to cut down on dust). It sort of looked like a metal detector, only you had to press it against the ceiling (which was hard because it was heavy). No pictures of the sanding happening, but below Dave surveys the work to be done. You can also see that we put up drop cloths to prevent dust from going throughout the entire house (the shop vac systems worked, but still a lot of dust was generated). Oh and we had to buy a special drywall bag for the shop vac, as the dust particles are too fine for the normal set up.
After the sanding, we painted the ceiling flat white, why oh why did the previous owners of both our homes paint all the ceilings gloss? The ceilings aren't perfect, but they look a lot better, and really how many people come in and stare at your ceiling?

Now we could move onto the fun stuff. A new chandelier!
 I got this chandelier at a neighbor's garage sale for $20. He contends it was hand made in Texas and is one of a kind! It's gorgeous and looks like something that would cost one zillion times the price at Restoration Hardware. Of course I then proceeded to spend $70 on new faux beeswax "candle" covers. But I'm so pleased with the final product. AND I sold the Italian glass chandelier from our old house on Craigslist for the same price that I bought it for on ebay all those many years ago.

Thursday, February 20, 2014

Outside Updates: A Path Through Tree Roots

We went to Montana for vacation this past summer (which is GORGEOUS, book a trip right now) and saw such beautiful wild flowers! Outside of Glacier National Park, we stayed at the Izaak Walton Inn & Resort in Essex and got inspired by their landscaping.

This was a lovely brick pathway, edged by flowers. Once home, we set about recreating this look in Houston.

Obviously, we the plants have a way to go in terms of growth and winter was especially hard on them (this picture was taken in the fall). 
We scored these white bricks from the side of the road for free and used salvaged bricks that were here when we moved for the edging. We keep a pretty large gaps in between the bricks (mostly because of the amount of white bricks we had available) and then had many challenges with the large tree roots running at ground level. If you look towards the top of the picture you can pick out how the white bricks start to deviate from the herringbone pattern. We didn't want to jeopardize the health of our many trees by hacking these roots to bits to remove them.

More Kitchen Update

Last night I worked on reattaching the face boards to the cabinets that surround the sink and putting on a first coat of paint.


I still need to work on the cabinet doors for the sink. We had to cut about 8 inches off the doors (which was fantastic because the veneer on the bottom was all tore up from years of being kicked and having water splashed on them). But I'm going to have to use a router to dig out the little hole that is needed on the back side for the hinge (since one the old ones got cut off). And I'll need to "make a jig." Further research needed.

And if you notice on the left side of the photo, things still look unfinished. There is another wide piece of butcherblock for that section. It will be the topper for the metal legs pictured. And on the very far left (where a black trash can is currently located) we'll installed a wine fridge. That is still to be purchased and a lot of investigations are needed because they vary wildly in prices and I really don't want to spend more than a couple hundred bucks. The metal legs will get refinished and painted black. We are currently debating whether or not to get this professionally powder coated or not. I vote for just simple Rustoleum because it's easy and cheap (we already own the paint). But for long term durability, powder coating is probably a better option. But before that can happen we need to weld cross braces at the top and little adjustable feet at the bottom.

We went about this kitchen renovation probably totally backwards. The floor is SO HIDEOUS and it will be replaced. We probably should have started with that, but we didn't. Ho hum, so that will happen somewhere down the line. After the countertops and backsplash is finished, we'll probably get to work on tearing out the tile in the dining room (since we know there are hardwood floors underneath).


Wednesday, February 19, 2014

Kitchen Update

Oh it's been forever since I've updated this blog but some progress has been made in the kitchen.
This is what the kitchen looked like when we moved in. Super hideous.

Work began immediately to paint the cabinets and plans were made to redo the blue laminate countertops. 
We decided on butcher block for financial reasons. We bought 3 huge slabs of it from Ikea for about $700. We went with the ole Waterlox routine to seal them.


Before the countertops could go on we had to rip down the old backsplash (below).
Then it was time to replace the sink. The old sink was super nasty and cheap with duct tape all over the bottom of it to muffle noise. I was so glad to see it leave the house. Due to leaks over the years, the original sink cabinet had deteriorated and we had to rebuild it from scratch. We used a sign that read "AMERICA" and unwittingly now have an ode to my brother in law Eric.
 I built the shelf for the sink (this was pretty easy, just attached 2x4's to the sides. Directions said it needs to support 300 pounds and I'm not sure if that's possible, but it's pretty sturdy. I never really figured out how one was supposed to secure the sink in place, so it's technically just resting there, wedged between the supports and the countertop (with some silicone caulk in between the top of the sink and the counter for good measure).
 Hurrah!
We installed the faucet and new disposal last night! 4 days without a kitchen sink was very tough. I shall take some photographs tonight of the almost finished project. We'll still need to install the new cabinet doors, but figure it will be nice to have a clear view of the underneath, while we determine if everything is truly watertight.

Tuesday, May 15, 2012

Wow long time, no write

It's been so long since I last posted! I have no real excuse, other than being busy at work. I also really need to take better photos.
But there has been progress on the home front!

We installed the tile surround. Since I ordered the tiles in stages over the course of a year and from different suppliers, I had to lay out the pattern on the ground to make sure that the different variations were appropriately spread out.

 Ringo helped us lay out the pattern!
 Nearly done, except for the grout!
 We went with gray grout in hopes it will be easier to keep looking clean.
Mission accomplished!!! Super awesome wall oven, microwave with surround and 36" gas cooktop. HURRAAHHHH.

In case you forgot, this is what the this part of the kitchen looked like when we moved in:


Thursday, January 12, 2012

Happy New Year!

Over the winter break house renovations continued. It was a total bummer though because the plan was to play "Renovation Realities" (I love that show) and install the carrara marble subway tile around the cooktop. Unfortunately someone (me) didn't order enough tile. And we couldn't even start, since when the new tile comes, if it's wildly different it will need to be shuffled into the deck.
So we did other things.
AND THE MOST AMAZING THING HAPPENED. We removed the old crappy wall oven from the 70s and found hardwood floors! Which means that there are hardwood floors underneath our HIDEOUS brown tile floors. At least in the dining room and part of the kitchen. So exciting and will hopefully save us so much money, as refinishing floors will be a lot cheaper than buying and installing tile. We'll just have to decide what to do to join the rooms (dining and kitchen are pretty open concept). We could install wood in the kitchen, but that's probably not the most practical solution, since I'm messy and we have dogs.
I also continued painting kitchen cabinets.

And here is an after shot (minus the new herringbone marble backsplash of course).
Soon to be revealed is our new stainless microwave oven and trim kit, for that built-in look!